
【PHP入門】クラスの作成と継承
あれ??前にも似たような記事を書いた気がしますね。前回書いた内容と若干被るところもあるかと思うので復習しつつ話を進めていきましょう!
以前の記事はPHPオブジェクト指向の超キ・ホ・ン、クラスを理解しようを参照して下さい。
まずは上記記事の復習から。
目次
クラスの作り方
|
1 2 3 4 5 6 7 8 9 10 11 12 13 14 15 16 17 18 |
[sourcecode lang="php"] <?php $pc = new PC(); class PC{ private $inputKey; function setInputKey($inputKey) { $this->inputKey = $inputKey; } function getInputKey(){ return $this->inputKey; } } $pc->setInputKey("ああああ"); echo $pc->getInputKey(); ?> [/sourcecode] |
こんな感じでしたね。
- new演算子でクラスの実体(インスタンス)を生成
- クラスの中でメンバ変数、メンバメソッドを設定
メンバ変数とはクラスの中で宣言する変数のことでプロパティとも言います。
|
1 |
[sourcecode lang="php"]private $inputKey;[/sourcecode] |
メンバメソッド?あぁ…これは説明していなかったですね(汗)。メンバメソッドとはクラスの中で定義する関数のことです。上記のコードであれば
|
1 2 3 4 5 6 7 8 9 |
[sourcecode lang="php"] function setInputKey($inputKey){ $this->inputKey = $inputKey; } function getInputKey(){ return $this->inputKey; } [/sourcecode] |
の関数になります。では上記のコードを発展させてPCクラスの機能を持った別の新しいクラスを作ってみましょう。
クラスの継承とは
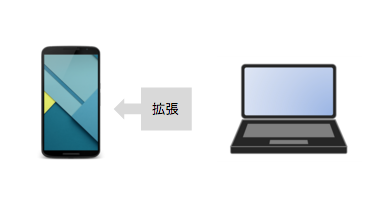
継承とはあるクラスを元に別の新しいクラスを作り拡張する仕組みのことです。
今回はPCクラスを拡張しSmartPhoneクラスを作ってみます。
クラスの継承をプログラミングしてみよう!
クラスの継承について簡単に説明しましたので実際にプログラミングしてみましょう!手順は以前書いた記事に習って説明していきます。
1. 親クラス・子クラスを作ってみる

|
1 |
[sourcecode lang="php"]<?php class smartPhone extends PC {} ?>[/sourcecode] |
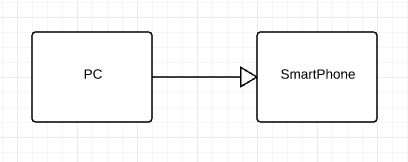
書式は上の通りです。継承元のクラス(PCクラス)を親クラスまたはスーパークラス、継承先のクラス(smartPhoneクラス)を子クラスまたはサブクラスという言い方をします。
ちなみに接頭辞のスーパー(super-)とは「上の」、サブ(sub-)とは「下の」という意味になります。クラス図も作ってみました。プログラムを書く前にクラス図を書いておくと、大変プログラムが作りやすくなります。
2. スーパークラスのメンバ変数を呼び出してみる
new演算子で子クラスの実体を作り、子クラスのオブジェクトから親クラスのメンバ変数を呼び出せるか試してみましょう。
|
1 2 3 4 5 6 7 8 9 10 11 12 13 14 15 16 17 18 19 20 21 22 23 |
[sourcecode lang="php"] <?php class PC{ public $inputKey; function setInputKey($inputKey){ $this->inputKey = $inputKey; } function getInputKey(){ return $this->inputKey; } } class SmartPhone extends PC{} $smartPhone = new SmartPhone(); $smartPhone->setInputKey("わわわわ"); echo $smartPhone->getInputKey(); ?> [/sourcecode] |
子クラスのオブジェクトから親クラスのメンバ変数を参照できるようになります。
3. 子クラスでメンバ変数・メンバメソッドを定義してみる!
親クラスだけでなく、子クラスにもメンバ変数とメンバメソッドを設定してみましょう。
|
1 2 3 4 5 6 7 8 9 10 11 12 13 14 15 16 17 18 19 20 21 22 23 24 25 26 27 28 29 30 31 32 33 34 35 |
[sourcecode lang="php"] <?php class PC{ public $inputKey; function setInputKey($inputKey){ $this->inputKey = $inputKey; } function getInputKey(){ return $this->inputKey; } } class SmartPhone extends PC{ public $touchKey; function setTouchKey($touchKey){ $this->touchKey = $touchKey; } function getTouchKey(){ return $this->touchKey; } } $smartPhone = new SmartPhone(); $smartPhone->setInputKey("ああああ\n"); $smartPhone->setTouchKey("わわわわ\n"); echo $smartPhone->getInputKey(); echo $smartPhone->getTouchKey(); ?> [/sourcecode] |
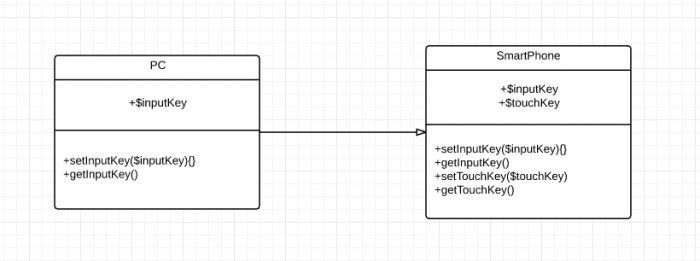
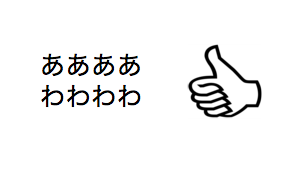
子クラスで新しくメンバ変数、メンバメソッドを定義し呼び出すことができました。クラス図も載せておきます。
4. アクセス修飾子について見直してみる!
さて、ここでアクセス修飾子について見直してみましょう!前回記事で軽く紹介していますね。再掲します。
- public…クラスの中、外、どこからでもメンバ変数にアクセス
- protected…同じクラスもしくはその派生クラス内のメンバ変数にアクセス
- private…同じクラス内のメンバ変数のみアクセス
|
1 2 3 4 5 6 7 8 9 10 11 12 13 14 15 16 17 18 19 20 21 22 23 24 25 26 27 28 29 30 31 32 33 34 35 36 |
[sourcecode lang="php"] <?php class PC{ function setInputKey($inputKey){ $this->inputKey = $inputKey; } function getInputKey(){ return $this->inputKey; } } class SmartPhone extends PC{ private $inputKey; public $touchKey; function setTouchKey($touchKey){ $this->touchKey = $touchKey; } function getTouchKey(){ return $this->touchKey; } } $smartPhone = new SmartPhone(); $smartPhone->setInputKey("ああああ\n"); $smartPhone->setTouchKey("わわわわ\n"); echo $smartPhone->getInputKey(); echo $smartPhone->getTouchKey(); ?> [/sourcecode] |
3.で書いたコードを変えてみました。上記のコードでは子クラスで親クラスのメンバ変数を宣言しています。privateは同じクラス内のメンバ変数しかアクセスできません。このコードを実行するとどうなるでしょうか?

wandboxで試してみたところ、エラーが発生しましたね。privateは上記の通り、同じクラス内のメンバ変数にしかアクセスできません。$inputKeyは親クラスであるPCクラスのメンバ変数なのでprivateを付けてアクセスすることはできないわけですね。
protectedは同じクラスもしくはその派生クラス内のメンバ変数にアクセスできるので、上記のコードでは親クラス、子クラスどちらで付けてもアクセスできます。
以上がクラスの継承の基本的な説明になります。
【参考文献】・とほほのWWW入門 PHP入門 – クラス・IT専科 クラス図


